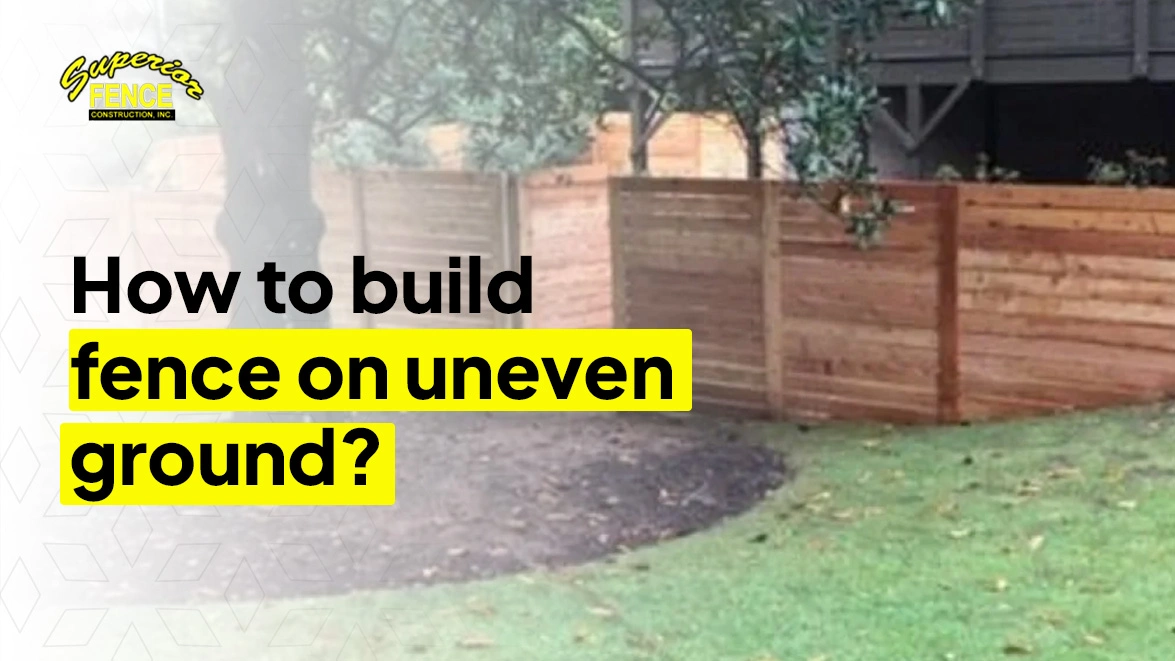
Uneven ground can make fence installation more complicated, especially when the slope changes at different points along your garden. A stepped fence keeps each section level and handles sharper height changes, while a racked fence follows a steadier incline and leaves fewer gaps underneath. Before digging, check your boundaries, local permits, underground utilities, and drainage. Your choice of wood, vinyl, metal, or chain-link fencing also affects installation. With accurate measurements and carefully positioned posts, you can build a fence on uneven ground that follows your garden’s shape without awkward gaps or uneven panels.
Key Takeaways
|
Table of Contents
ToggleWhat Makes Fencing Uneven Ground More Challenging?
A sloping garden presents problems that flat-ground installations rarely face. Changing elevations affect panel positions, post heights, and the finished appearance. Even a gentle incline can leave awkward spaces underneath rigid panels. Meanwhile, water traveling downhill may gradually wash soil from exposed footings.
Before choosing a fence, consider these common challenges:
- Uneven bottom clearance: Large openings can compromise privacy and allow pets to escape.
- Unstable ground: Loose soil and erosion can weaken the support around fence posts.
- Irregular panel alignment: Sudden dips can make standard fence sections difficult to position.
- Gate clearance: A swinging gate may catch the rising ground beside its opening.
- Additional installation work: Complicated slopes often require custom cuts, longer posts, or specialist equipment.
The key is understanding your garden before selecting materials. A careful site inspection helps prevent expensive changes during installation.
Which Fence Installation Method Works for Uneven Ground?
Your slope’s shape determines how the finished fence should follow it. Three approaches can accommodate different terrain without unnecessarily leveling your entire garden.
1. Stepped Fencing
Stepped fencing creates a staircase effect across sloping or irregular ground. Each panel stays horizontal while the next section sits lower. This method suits rigid panels and areas with noticeable elevation changes.
For example, imagine a garden dropping 24 inches across two equal sections. You could lower each successive panel by approximately 12 inches. However, actual measurements must account for changes between individual post positions.
Stepped fencing offers several advantages:
- Works with many traditional wood and rigid panel designs.
- Creates a deliberate appearance across steeper garden sections.
- Lets individual panels stay level during installation.
The main drawback is the triangular gap beneath each section. Those openings need particular attention when containing smaller pets.
2. Racked or Contour Fencing
Racked fencing angles the rails to match the ground’s natural incline. Unlike stepped sections, the bottom edge follows the slope more closely. Properly designed panels also keep their vertical pickets upright.
This approach suits gradual slopes with reasonably consistent elevation changes. However, not every prefabricated panel can accommodate the required angle.
Some manufacturers offer adjustable panels with specific maximum racking limits. Always check those specifications before purchasing your fencing materials.
Racked installations provide several practical benefits:
- Create a continuous appearance across gradual slopes.
- Reduce large openings beneath suitable fence panels.
- Accommodate gradual elevation changes without pronounced steps.
Remember that racking cannot automatically correct every dip or hollow. An irregular section may need shorter spans or additional posts.
3. Custom and Tiered Fencing
Some gardens combine gentle inclines with sudden drops or uneven terraces. These conditions often require more than one installation method.
Custom fencing can use shorter sections around difficult elevation changes. For example, shorter wood panels can accommodate an awkward corner. Meanwhile, longer racked sections can follow the smoother adjoining ground.
Tiered layouts may also suit gardens with significant height differences. However, retaining soil requires a separate structural design.
A conventional fence must never replace a properly designed retaining wall. Seek specialist advice when the ground needs structural support.
Stepped vs Racked vs Custom Fencing
| Feature | Stepped fencing | Racked fencing | Custom fencing |
| Suitable terrain | Sharper changes | Gentle, consistent slopes | Irregular ground |
| Panel position | Horizontal | Follows the incline | Adjusted individually |
| Bottom gaps | Often larger | Usually smaller | Depends on design |
| Installation complexity | Moderate | Product-dependent | Often higher |
| Main consideration | Clearance underneath | Panel racking limits | Additional labour |
For many gardens, combining methods offers a practical solution. However, always measure individual sections before deciding your final layout.
What Type of Fence Works on Uneven Ground?
Different fencing materials respond differently to changes in ground level. Consider your privacy needs, maintenance preferences, and the actual slope.
Wood Fencing
Wood offers considerable flexibility when building across uneven garden areas. You can adjust individual boards and create custom-sized fence sections.
For a privacy fence, install angled rails where appropriate. Then cut individual pickets to maintain the desired bottom clearance. Alternatively, use horizontal panels to create a stepped layout.
Cedar and pressure-treated timber provide different appearance and maintenance options. Choose products suitable for outdoor use and ground contact where required. Wood also allows repairs without replacing entire fence runs. However, exposed cut ends need appropriate protection against moisture.
Vinyl Fencing
Vinyl fencing offers a clean finish without routine painting or staining. However, its installation flexibility depends on the selected panel system.
Some vinyl panels accommodate slopes through adjustable rails and connections. Others require stepped installation because their components cannot rack safely. Before ordering, check the manufacturer’s permitted slope and installation instructions. Don’t force standard panels into positions they cannot accommodate.
Also consider the post lengths needed for stepped installations. A sharp drop may require longer posts or different components.
Aluminum and Ornamental Metal Fencing
Aluminum and ornamental metal fencing suits gardens that need visible boundaries. Many manufacturers offer rackable panels designed for sloping ground.
These systems can follow gradual inclines while keeping pickets upright. However, panel adjustment limits vary considerably between manufacturers.
For steeper areas, stepped sections may be a better alternative. Check whether the chosen brackets support the planned installation angle. Ornamental fencing also leaves spaces between individual pickets. Consider those openings carefully when fencing areas used by small pets.
Chain-Link Fencing
Chain-link fencing offers flexibility across long or gently sloping boundaries. Its woven mesh can accommodate changing elevations with suitable installation techniques.
Installers can adjust the fabric and tensioning to follow the terrain. However, sharper transitions may require additional posts or specialist fitting. Unlike solid privacy fencing, chain-link allows visibility through the boundary. Privacy slats can provide additional screening where the system permits them.
For pet enclosures, pay particular attention to the bottom edge. Suitable bottom tensioning helps prevent animals from pushing underneath the mesh.
Tools and Materials You Will Need
Good preparation makes installation easier once you start digging. Gather the appropriate equipment before marking your fence line.
| Tools and materials | Purpose |
| Tape measure | Measure fence length, post spacing, and elevation changes |
| Wooden stakes and mason’s line | Mark boundaries and establish straight reference lines |
| Spirit level or laser level | Check horizontal reference lines and post alignment |
| Plumb bob | Transfer measurements from elevated lines to ground positions |
| Post-hole digger or auger | Prepare holes for the fence posts |
| Fence posts and panels | Build the main fence structure |
| Gravel or concrete | Provide support where the specified footing design requires it |
| Saw and drill | Cut and secure suitable fencing components |
| Screws and brackets | Connect posts, rails, and panels |
| Gate hardware | Install hinges, latches, and necessary supports |
| Suitable protective finish | Protect exposed timber and vulnerable metal surfaces |
Choose fixings compatible with your particular fencing materials. Some systems require manufacturer-approved brackets or specialized installation tools.
For wood fencing, wear suitable protection when cutting treated timber. Follow the manufacturer’s handling and finishing instructions.
How to Measure the Slope Before Installing a Fence?
Accurate slope measurements prevent problems before you install the first post. Rather than estimating the incline visually, measure the actual elevation change.
Step 1: Establish a Level Reference Line
Start by marking the beginning and end of your proposed fence. Drive a wooden stake into the ground at each position. Stretch a mason’s line between the stakes and level it. Use a line level or laser level to confirm alignment. For longer boundaries, set up separate reference lines as needed. This helps you measure changing elevations without guessing.
Step 2: Measure the Rise or Drop
Measure the vertical distance between your reference line and the ground. Repeat this measurement at every proposed post position. Record each reading before moving to the next section. These measurements show where the land rises or falls. For example, imagine a fence line measuring 16 feet horizontally. The ground falls 24 inches between its endpoints. You now know the total drop across that section.
Step 3: Calculate the Slope
You can calculate slope percentage using a simple formula:
Slope percentage = (Vertical change ÷ Horizontal distance) × 100
Both measurements must use the same units.
In our example, the horizontal distance equals 192 inches. Dividing 24 by 192 gives a slope of 12.5%. This calculation describes the overall incline across the measured section. However, it doesn’t reveal smaller dips between the endpoints.
For a stepped fence, calculate the drop between actual post positions. Two equal sections could each drop 12 inches on uniform ground. Irregular terrain requires separate measurements for each section.
Step 4: Identify Sudden Changes in Grade
A garden rarely follows one perfectly straight slope. Look for hollows, raised patches, and areas where the incline changes. Mark these points before finalizing your post spacing. An additional post near a significant change can simplify installation. Also check the ground around your proposed gate opening. A relatively level gate position can prevent clearance problems later.
How to Build Your Fence: Step-by-Step Installation?
Once you’ve measured the slope, you can begin planning the installation. The following steps cover the main tasks for most residential fences. However, post dimensions, footing requirements, and panel connections depend on your chosen system. Always follow the relevant manufacturer instructions and local building requirements.
1. Check Property Boundaries, Permits, and Underground Utilities
A successful installation begins with confirming exactly where you can build. Check your property survey before marking the proposed fence boundary. If the boundary remains uncertain, arrange a professional survey. Existing fences and garden features don’t necessarily mark legal property lines.
Next, check local fencing requirements and any applicable neighborhood restrictions. Oklahoma City requires permits for residential fence construction. Other municipalities may apply different rules.
Before digging, contact OKIE811 to arrange underground utility markings. Submit your request at least three business days beforehand. Wait for the required responses and respect the marked locations. Remember that private services may need separate locating arrangements. These can include irrigation pipes and privately owned electrical cables.
2. Mark the Fence Line and Post Positions
Clear the proposed boundary of loose debris and vegetation. Avoid disturbing established drainage channels or removing significant soil unnecessarily. Next, mark corners, ends, and gate openings with wooden stakes. Stretch a string between them to establish straight reference lines. Measure post positions according to your selected fence system. Don’t assume every panel uses the same standard spacing.
Pay particular attention to these locations:
- Corners: Allow for the correct post size and adjoining panel connections.
- Gate openings: Account for hinges, latches, and manufacturer-required clearances.
- Slope changes: Consider additional posts where the ground changes direction sharply.
- Panel transitions: Ensure adjoining sections can connect at their planned elevations.
Measure everything again before digging your first hole. Moving a stake is considerably easier than moving a concrete footing.
3. Prepare the Post Holes and Footings
Strong posts provide the foundation for your entire fence. Begin by checking the specified footing depth and diameter. Fence height, soil conditions, wind exposure, and post material affect these requirements. Gate and corner posts may also need additional support. Dig each hole according to the approved installation specifications. On sloping ground, check the required depth from the relevant ground level.
Some footing designs require gravel or concrete for additional support. However, adding gravel doesn’t automatically solve poor drainage. For example, water can remain trapped in poorly draining soil. Investigate persistent waterlogging rather than relying on a gravel layer alone. Prepare each footing according to its specified construction method. If you encounter unstable soil or buried obstacles, reassess the design.
4. Set and Align the Fence Posts
Correct post alignment makes every following installation step much easier. Begin with your corner, end, and gate posts. Position each post inside its prepared hole. Use a post level to check both vertical directions. Every post must remain plumb even when the ground slopes. Temporarily brace the posts while securing their footings. Keep checking their positions as you add the specified material.
Once your main posts are secure, establish a string reference. Use this line to position the remaining posts accurately. Leave sufficient post length for the planned panel connections. Avoid trimming everything before confirming the finished heights. Allow the footings to cure according to their specifications. Don’t attach heavy panels or gates before they can support the loads.
5. Install Stepped Fence Panels
Stepped fencing requires careful positioning because every section stays horizontal. Start at a known elevation and work along the boundary. Follow this sequence for a typical stepped installation:
- Measure the elevation difference between two neighboring posts.
- Mark the planned panel height and mounting positions.
- Check that the panel fits the available post spacing.
- Position the panel horizontally using a spirit level.
- Secure it with the specified brackets or fixings.
- Lower or raise the next section according to your measurements.
Continue checking each panel before securing the next section. Small errors can become noticeable across longer fence runs. Remember that shorter panels may reduce gaps beneath stepped sections. However, additional posts increase material and installation requirements. Always confirm the permitted post spacing before making adjustments.
6. Install Racked Fence Panels
Racked installations follow the incline rather than forming horizontal steps. First, confirm that your selected panel supports the measured slope. Position the panel between its prepared posts and establish its angle. The top and bottom rails should follow the intended grade.
Meanwhile, the vertical pickets should remain upright where the system requires them. Adjust the panel according to the manufacturer’s installation instructions. Then secure its brackets or connections once the alignment is correct. Check the entire section before tightening the remaining fixings. Uneven post positions can prevent panels from racking correctly.
For site-built wood fencing, angle the rails where appropriate. Install individual pickets vertically and adjust their lengths to suit. Never force a rigid panel beyond its permitted adjustment range. Choose shorter sections or stepped fencing when necessary.
7. Adjust the Bottom Clearance
Bottom clearance affects privacy, drainage, and animal containment. Inspect each installed section before completing the remaining fence.
Measure the openings beneath the panels at several points. Pay particular attention to the downhill ends of stepped sections. If gaps are excessive, consider suitable panel adjustments or custom-cut boards. Choose components compatible with the existing fence structure.
You can sometimes cut wood pickets individually to suit uneven ground. However, leave appropriate clearance to limit prolonged moisture contact. For chain-link fencing, use suitable bottom tensioning or approved attachments. Avoid leaving loose fabric that animals could push underneath.
8. Install the Gate and Finish the Fence
A gate needs different planning from a fixed fence panel. Its swinging movement must clear the surrounding ground. Position the gate where the terrain allows it to operate properly. Check the entire opening arc before fixing its final position.
For example, a gate swinging towards rising ground may scrape. An alternative swing direction or suitable hinge arrangement may solve this. Next, check the gate’s alignment, hinges, and latch operation. Ensure its supporting posts can handle the intended loads.
Once everything fits correctly, complete the finishing work:
- Trim post tops after confirming the finished heights.
- Protect exposed timber cuts using suitable treatment.
- Finish wooden surfaces according to the manufacturer’s instructions.
- Repair any damaged protective coating on metal components.
- Remove installation debris and check the surrounding drainage.
Finally, open and close the gate several times. Check the completed fence from both sides for visible alignment problems.
How Do You Fix Gaps Under a Fence on a Slope?
Large gaps beneath fencing can create several frustrating problems. They reduce privacy and give smaller pets an escape route. However, the right solution depends on your fence material and terrain.
Adjust Individual Fence Boards
Custom-cut boards offer a practical solution for uneven wooden fences. Measure the clearance beneath each section before making adjustments. You can extend individual pickets to follow minor changes in ground level. Leave suitable clearance so timber doesn’t remain in damp soil. For stepped fencing, shorter sections may also reduce excessive openings. This approach works particularly well around sudden elevation changes.
Install Suitable Bottom Extensions
Some fencing systems support compatible bottom extensions or additional components. These can help close openings without replacing complete fence sections. For example, an approved mesh extension may improve pet containment. However, attachments must suit the existing fence and its structural design. Don’t attach heavy materials without checking the supporting posts and rails.
Use Landscaping Carefully
Small changes to the surrounding ground can improve the fence’s appearance. However, adding soil indiscriminately may create new drainage problems. Consider suitable planting or erosion-control measures around exposed areas. Avoid piling soil against wooden boards or blocking existing water channels. If erosion caused the gap, address that problem first. Otherwise, the opening may return after the next heavy rainfall.
Create a Secure Boundary for Pets
Small dogs can exploit surprisingly narrow openings beneath fencing. Check the entire boundary, not just obvious gaps. For suitable chain-link systems, bottom tensioning can reduce loose openings. Other fences may require compatible barriers or specialist modifications. Also inspect gate clearances and corners for potential escape routes. Your fence should provide continuous containment around the entire enclosed area.
How Much Does Installing a Fence on Uneven Ground Cost?
Uneven terrain can increase installation costs because it requires extra preparation and labor. However, the final price depends on your specific property. Some expert construction companies publish a general Oklahoma installation estimate of $10–$50 per linear foot. This is a broad estimate, not a slope-specific quotation.
Several factors affect your project cost, such as:
Fence Material and Height
Different fencing materials have different purchasing and installation requirements. Taller fences may also need stronger posts and larger footings. For example, a custom wooden privacy fence requires fitting each board individually. A suitable chain-link system may offer a different installation approach. Compare complete installed costs rather than material prices alone.
Slope and Ground Conditions
A gentle incline usually requires fewer adjustments than an irregular hillside. Steeper sections may need additional posts or custom-sized panels. Rocky ground, unstable soil, and difficult access can increase labor. Existing structures may also complicate machinery access and material handling. Major excavation or retaining work requires separate planning and pricing.
Gates and Custom Components
Gates add hardware, supporting posts, and additional installation work. Sloping entrances may also require specialist hinges or custom designs. Likewise, shorter panels and non-standard connections can increase material requirements. Request an itemized estimate that separates these additional costs.
How to Estimate Your Project Budget
Start by measuring the full fence line in feet. Then identify the required height, material, and number of gates. For illustration, consider a 100-foot boundary using the published general range.
| Item | Illustrative estimate |
| Fence length | 100 linear feet |
| General installed rate | $10–$50 per foot |
| Broad starting calculation | $1,000–$5,000 |
This calculation isn’t a quotation for a sloping property. Actual costs may exceed the range where site conditions require additional work.
For a more useful estimate, document the following details:
- Total boundary length and proposed fence height.
- Measured elevation changes between proposed posts.
- Preferred fencing material and installation method.
- Number of gates and any specialist hardware.
- Existing fencing that requires removal.
- Drainage issues, obstacles, or difficult ground conditions.
A site-specific quotation helps confirm the project’s actual requirements.
Common Mistakes to Avoid When Fencing Uneven Ground
Even carefully planned projects can develop problems through small installation errors. Recognizing these mistakes early can prevent unnecessary repairs.
Choosing the Wrong Installation Method
A rigid panel cannot always follow the ground’s natural slope. Forcing it into position can damage connections and create poor alignment. Check the manufacturer’s specifications before choosing stepped or racked installation. Select a custom arrangement when standard panels cannot accommodate the terrain.
Measuring Only the Overall Slope
One measurement rarely captures every rise and dip. Your garden may change elevation several times along the boundary. Measure the ground at each proposed post position. Record additional readings wherever the incline changes noticeably. These details help you plan individual panel positions accurately.
Installing Posts at the Wrong Angle
Fence posts should stand vertically despite the surrounding slope. Leaning posts can create alignment problems across adjoining sections. Use a post level throughout installation. Check both directions before securing each footing.
Cutting Posts Too Early
Trimming posts before confirming panel positions can create expensive problems. A post that’s too short may need replacing. Leave adequate length until you’ve established the finished elevations. Then mark and trim suitable posts according to the design.
Ignoring Water Runoff
Water traveling downhill can gradually remove soil around fence footings. This movement may eventually affect the fence’s stability. Inspect existing drainage routes before beginning construction. Avoid creating barriers that redirect water towards buildings or neighboring properties. Where erosion is significant, obtain suitable drainage advice.
Positioning Gates Without Checking Their Swing
A gate may fit perfectly but still be impossible to open. Rising ground can obstruct its movement or damage the lower edge. Check the full swing before installing the hinges. Consider alternative positions where the surrounding terrain creates clearance problems.
Overlooking Maintenance
Sloping ground can expose fencing to changing moisture and soil conditions. Regular checks help identify small problems before they become expensive. Inspect post bases, fasteners, bottom clearances, and gate alignment. Address erosion or loose components as soon as you notice them.
Should You Build a Sloped Fence Yourself or Hire a Professional?
Some uneven-ground projects suit confident DIY homeowners with suitable equipment. Others require specialist installation because the terrain adds risk.
A straightforward project may be manageable when:
- The slope is gentle and reasonably consistent.
- Property boundaries and underground utilities have been confirmed.
- The selected fence system supports the measured incline.
- The soil provides suitable conditions for the specified footings.
- Gate installation and material handling remain manageable.
However, complex terrain can quickly change the project’s requirements. Professional assistance is especially useful with unstable soil, severe slopes, and difficult drainage. Large privacy fences may also require additional structural considerations.
If your property needs retaining work, consult an appropriate specialist. A fence installer shouldn’t treat ordinary fence posts as soil-retaining structures.
Frequently Asked Questions
What Is the Best Fence for a Sloping Garden?
The most suitable fence depends on the slope and your priorities. Wood offers flexibility for custom boards and irregular ground. Meanwhile, suitable rackable metal panels and chain-link fencing work well on many gradual inclines. Rigid panels may require stepped installation on sharper slopes.
Can You Install a Privacy Fence on Uneven Ground?
Yes, you can install privacy fencing across many uneven garden areas. Stepped wood panels and custom-cut boards accommodate different elevation changes. However, standard stepped panels may leave large gaps beneath them. Consider bottom clearance and privacy requirements before choosing the installation method.
Can You Install Fence Posts at Different Heights?
Yes, visible post heights can vary across sloping ground. However, every post should remain plumb and provide the specified support. Plan post lengths around the finished panel elevations. Always maintain the required footing dimensions and embedment for your system.
Can You Build a Fence Without Leveling the Ground?
Many sloping gardens don’t require complete leveling before fence installation. Stepped and racked fencing can accommodate existing elevation changes. However, unstable ground or severe erosion may require separate preparation. Avoid unnecessary grading that could disrupt drainage or affect neighboring properties.
What Is the Best Way to Fence a Steep Slope?
Stepped fencing often accommodates steeper slopes using horizontal panel sections. However, the appropriate method depends on the actual terrain and selected system. Very steep or unstable ground may require specialist assessment. Check bottom gaps, post support, and drainage before finalizing the design.
Conclusion
Building a fence across uneven ground starts with understanding the slope, not fighting it. Measure each change in elevation and choose panels that suit the terrain. Stepped sections handle sharper drops while rackable systems follow a steadier incline. Set every post plumb and use the specified footings for your soil conditions. Pay close attention to drainage, bottom gaps, and the gate’s full swing. These details protect both the finished appearance and everyday use of your fence.
If your garden has awkward slopes or difficult ground, Superior Fence Construction can help. Contact our team for a site-specific assessment and a free estimate for professional fencing tailored to your property.